Hydroponic Farming Explained: Types, Benefits, Techniques, Costs, Crops and more

Hydroponics
Content verified by our Agronomist
Hydroponic farming is a way to grow plants without soil. Instead of taking nutrients from the ground, plant roots sit in water that contains everything they need. Because the nutrients are delivered directly, you can control how plants grow much more closely. That usually leads to healthier plants and more consistent results. More people are turning to hydroponics as cities expand and farming becomes harder in unpredictable weather. It works in small home setups and large farms, and crops can grow throughout the year. Since it uses less water and space, it’s often seen as a practical option for modern farming.
Advantages of Hydroponics
Higher Yields
In hydroponics, plants receive the right amount of nutrients, water, and oxygen at all times. This helps them grow faster and healthier compared to soil-grown plants. Since conditions are controlled, crops can be grown multiple times in a year. For example, leafy vegetables like lettuce or spinach can be harvested 4–6 times annually instead of just 2–3 times in traditional farming. This increases total production and makes farming more profitable.
Saves Water
Hydroponics is very water-efficient because the same water is reused within the system instead of being lost in the soil. Only a small amount of water is lost through evaporation or plant use. As a result, hydroponics can save around 70–90% of water compared to conventional farming. This makes it especially useful in areas where water is limited.
Less Fertilizers and Chemicals
Since nutrients are directly supplied to the roots in a controlled way, plants use them more efficiently. This reduces the need for excess fertilizers. Also, because there is no soil, many common pests and diseases are avoided. As a result, farmers use fewer pesticides, making the produce safer and more environmentally friendly.
Grows in Any Weather
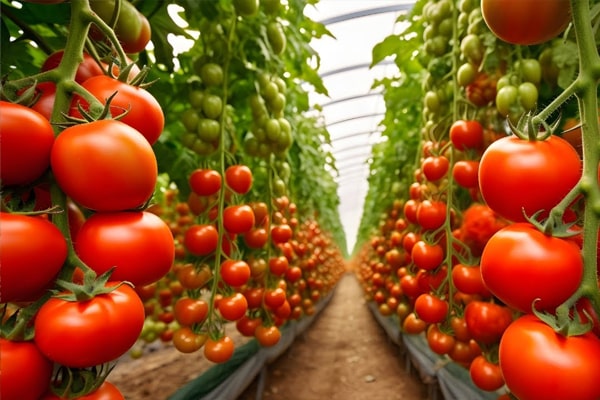
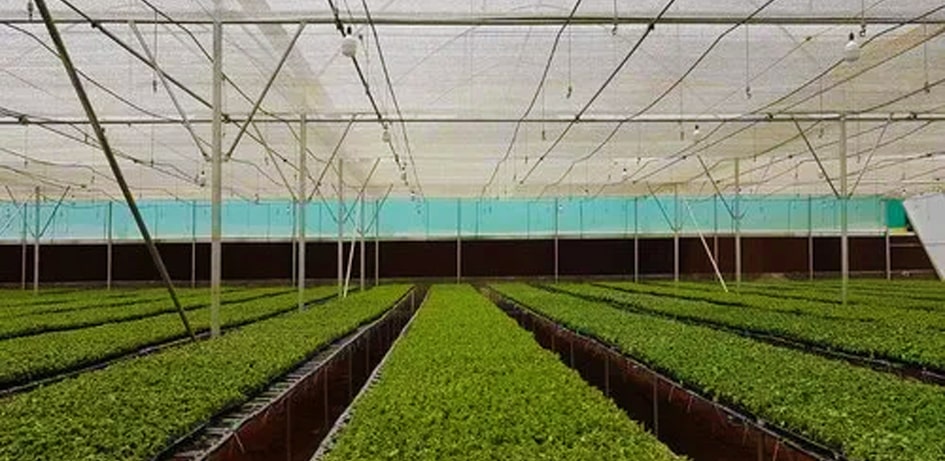
Hydroponic systems are usually set up in greenhouses or controlled indoor environments. This protects crops from extreme weather conditions like heavy rain, drought, heat waves, or hailstorms. Farmers can grow crops throughout the year without depending on seasons, which ensures a stable food supply.
Requires Less Space
Hydroponics does not require large agricultural land. Plants can be grown in small spaces such as rooftops, balconies, or indoor rooms. Vertical farming (growing plants in stacked layers) further increases productivity in limited space. This makes hydroponics ideal for cities and urban areas.
Less Physical Labor
Many hydroponic systems are automated with pumps and timers, which reduces manual work like watering and fertilizing. There is also no need for weeding, ploughing, or soil preparation. This saves time, effort, and labor costs.
Disadvantages of Hydroponics
Although hydroponics has many benefits, it also comes with some challenges that beginners should understand before starting.
High Setup Cost
The initial cost of setting up a hydroponic system is higher than traditional farming. It requires equipment such as containers, pumps, pipes, grow lights, and sometimes greenhouse structures. This can be expensive, especially for large-scale systems.
Needs Electricity
Most hydroponic systems depend on electricity to run pumps, lights, and climate control systems. If there is a power failure, the plants may not get water or oxygen, which can damage them quickly.
Requires Knowledge and Monitoring
Hydroponics requires regular monitoring of nutrient levels, pH balance, and water quality. Unlike soil farming, where plants can survive small mistakes, hydroponic systems need careful management. Beginners may need time to learn and adjust.
Risk of System Failure
Since all plants share the same water system, any problem such as contamination, pump failure, or incorrect nutrient levels can affect all plants at once. Regular checking and maintenance are necessary to avoid such risks.
Types of Hydroponic Systems
There are different types of hydroponic systems, and each one works in a slightly different way to supply water and nutrients to plants.
Wick System
The wick system is the simplest type of hydroponics. It uses a wick (like a cotton rope) to pull nutrient-rich water from a container to the plant roots. It does not need electricity or pumps, which makes it easy for beginners. However, it works best only for small plants like herbs because it cannot supply enough nutrients for larger plants.
Deep Water Culture (DWC)
In this system, plant roots are placed directly in nutrient-rich water. An air pump is used to provide oxygen to the roots so they do not rot. This method helps plants grow faster and is easy to maintain. However, it depends on electricity, and if the air pump stops working, the plants can be damaged quickly.
Nutrient Film Technique (NFT)
In NFT, a thin layer of nutrient solution continuously flows over the roots of plants. The roots absorb nutrients while also getting enough oxygen from the air. This system is efficient and uses very little water. However, it requires proper setup and constant monitoring, because any blockage or pump failure can affect all plants.
Ebb and Flow (Flood and Drain)
This system works by flooding the plant roots with nutrient solution at regular intervals and then draining it away. This gives plants both nutrients and oxygen. It is suitable for many types of plants, but it needs careful timing and equipment. If the system fails, plants may dry out quickly.
Drip System
In a drip system, nutrient solution is slowly delivered to each plant through small tubes. This allows precise control over how much water and nutrients each plant receives. It is commonly used for larger plants. However, the tubes can sometimes clog, and regular maintenance is needed.
Aeroponics
In aeroponics, plant roots are suspended in the air and sprayed with a fine mist of nutrients. This provides maximum oxygen and helps plants grow very fast. It is one of the most advanced and efficient systems, but it is also expensive and requires careful monitoring and technical knowledge.
Cost of Setting Up a Hydroponic Farm
Setting up a hydroponic farm usually costs more at the beginning compared to normal farming. However, prices are slowly becoming more affordable with better technology. The total cost depends on how big the system is and what type of setup you choose.
Small to Medium Scale
• A small hydroponic setup, such as on a rooftop or in a small indoor space (around 50–300 sq.m), can cost roughly between Rs. 10 lakh to Rs. 50 lakh.
• For very small setups like home systems or green wall units, the cost may start from around Rs. 5–10 lakh.
• A medium-sized indoor farm with equipment like racks, lights, pumps, and temperature control systems may cost around Rs. 20–40 lakh.
Large or Commercial Scale
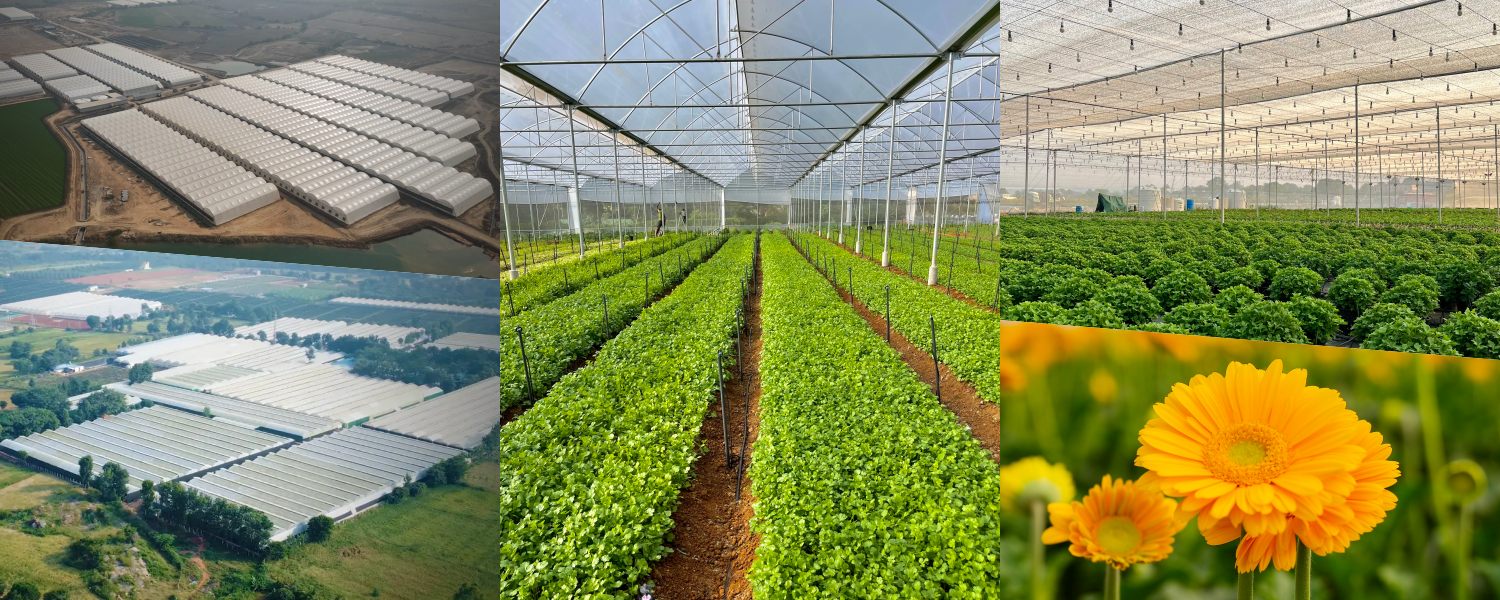
• For bigger farms, such as greenhouse projects (about 0.2 to 1 acre), the cost is much higher.
• A fully set up 1-acre hydroponic farm can cost around Rs. 1.1 crore to Rs. 1.5 crore (excluding land cost).
This includes:
• Greenhouse (polyhouse) structure
• Irrigation and nutrient delivery systems
• Cooling and climate control systems
• Other equipment and tools
Main Cost Components
Most of the money is spent on:
• Building the greenhouse or structure
• Installing pipes and irrigation systems
• Climate control systems like fans and cooling
• Lighting (especially LED grow lights for indoor farms)
• Automation systems
Example Costs
• A small urban setup (50–75 sq.m) may cost around Rs. 8–15 lakh
• A slightly larger setup (around 90 sq.m) can cost Rs. 20–40 lakh
• Large commercial farms can go beyond Rs. 1–2 crore
Other Costs to Consider
Apart from setup, farmers also need to spend on:
• Land (rent or purchase)
• Electricity
• Labour
• Nutrients and maintenance
Government Subsidies and Support
The Indian government supports hydroponics and greenhouse farming by giving financial help through schemes like MIDH (Mission for Horticulture) and NHB.
Subsidies from Central Government
Farmers can get up to 50% subsidy on the total cost of setting up a hydroponic farm.
For example:
• If a project costs Rs. 75 lakh, the government may give around Rs. 35 lakh as subsidy.
• Under some schemes, support is given based on area (like per square meter).
• Large projects can even get subsidies up to Rs. 1 crore.
State Government Support
Many state governments also provide extra support along with central schemes.
• General farmers usually get around 50% subsidy
• Some states offer up to 75% subsidy
• SC/ST farmers may get higher support (up to 80–95% in some states)
• Farmers in hilly or North-East regions may get extra benefits
What the Subsidy Covers
The subsidy can be used for:
• Greenhouse or polyhouse construction
• Irrigation and nutrient systems
• Cooling and climate control systems
• Hydroponic equipment and technology
How to Apply
To get the subsidy:
1. Prepare a project report (DPR)
2. Apply for a bank loan
3. Submit the application through government portals
4. After inspection, the subsidy is given (usually through the bank)
Setting Up a Hydroponic farm
A basic hydroponic setup requires a water reservoir, nutrient solution, plant supports, and environmental control. For example, a simple Deep Water Culture (DWC) system suspends plants (in net pots) above a tank of nutrient-rich water. The container can be as simple as a 5-gallon bucket or plastic bin. Plant roots dangle into the water to absorb nutrients. Common net pots and media (hydroton clay pebbles, coconut coir, or Rockwool) support each plant while allowing roots to access the solution. A small air pump with an air stone oxygenates the water.
Key equipment includes:
• Reservoir/container: Holds the nutrient solution. Use any food-safe container (bucket, bin or tank). Size it to accommodate the plants.
• Plant supports: Net pots or planting channels hold the plants. In systems like NFT or flood tables, plants sit in slotted pipes or trays; in DWC, plants rest in a floating lid or raft. Substrates (perlite, Rockwool cubes, vermiculite, coconut coir, etc.) anchor the roots and retain moisture.
• Nutrient solution: A high-quality hydroponic fertilizer (all-in-one minerals) dissolved in water. It must supply all 16 essential plant nutrients. Mix according to manufacturer instructions to create a concentrated stock solution.
• pH and EC meters: A digital pH meter and EC/PPM meter are essential for monitoring the nutrient solution. These gauges ensure nutrient strength is correct (electrical conductivity) and the pH is in the optimal range.
• Submersible pump (if needed): For systems like drip or flood tables, a pump circulates water. (Passive systems like DWC with airstones only require an air pump, no water pump.)
• Lighting: If growing indoors or in low light, use full-spectrum LED grow lights. LED lamps are energy-efficient and provide the right light spectrum (PAR) for photosynthesis. In a small system, even inexpensive LED strips can work, but commercial growers use high-output LED panels on timers.
• Air circulation: Fans provide fresh air and circulate humidity. Good airflow strengthens stems and prevents mould.
Indoor hydroponics typically relies on LED grow lights and controlled conditions to drive plant growth.
After setting up, start seedlings in a separate tray or rockwool plugs. Once seedlings have a root system, transfer them to the hydroponic system. Monitor the solution daily, adjusting nutrient strength and pH (using pH up/down solutions) to keep it optimal for your crop. Replace or refresh the entire solution every 1–2 weeks to prevent mineral imbalances.
Here is the hydroponics setup checklist: https://lp.protectedcultivation.com/hydroponics-setup-checklist/
Choosing Crops
Almost any vegetable can be grown hydroponically, but some thrive especially well. Easy, quick-growing choices for beginners are leafy greens and herbs, because they mature fast and have simple needs. For example, basil, lettuce, spinach, kale and cilantro are ideal for hydroponics. These greens and herbs do not fruit and suit indoor winter gardens. In warmer, larger setups, fruiting crops like tomatoes, cucumbers, peppers and strawberries can also be grown hydroponically. Commercial hydroponic farmers often focus on salad greens, microgreens, basil and herbs because these crops have high value and quick turnover. A rough guideline:
• Easy starter crops: Lettuce, spinach, kale, bok choy, chard, spinach, basil, mint, oregano.
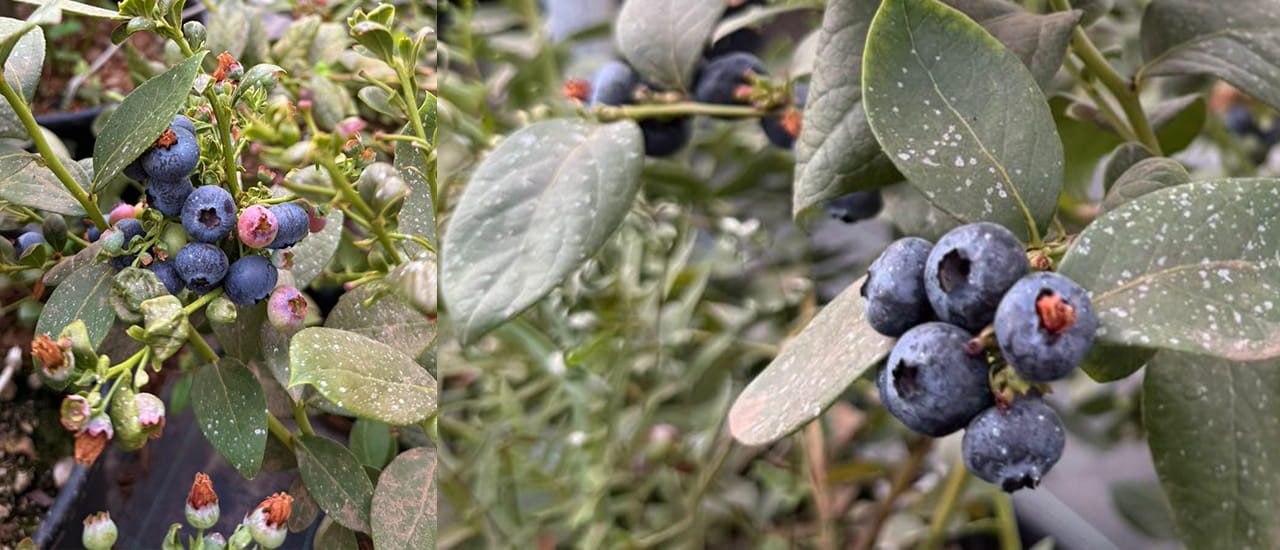
• Fruiting crops (advanced): Tomatoes, peppers, cucumbers, strawberries (require more light and support).
• Microgreens: Fast-growing, high-value sprouts (e.g. radish, broccoli, sunflower) are also well-suited.
Growing multiple short-cycle crops (like salad greens) in rotation will maximize yields. Perennial herbs (mint, thyme, rosemary) can be kept longer-term. Always choose varieties suited to container growing (compact cultivars).
Nutrient and Water Management
Don't let the technical terms scare you. Managing nutrients in hydroponics is simpler than it sounds - you just need two tools and a daily habit.
The two numbers to watch are pH (acidity of water) and EC (how strong your nutrient solution is). Think of pH like this: if it's off, your plant can't absorb food even if the food is right there. Keep pH between 5.5–6.0. For EC, lettuce likes it light (1.2–1.8 mS/cm), tomatoes like it stronger.
Daily routine (takes 5 minutes):
• Check pH and EC with a digital meter
• Top up the reservoir with clean water
• Adjust using pH up/down solution if needed
• Every 7–14 days, drain the tank completely and start fresh. This prevents salt buildup that can slowly poison your plants.
• One Indian-specific tip: always test your tap water first. Water quality varies massively across cities - Bangalore, Chennai, and Delhi have very different mineral levels. Many growers use RO filtered water to be safe.
Pest and Disease Management
Here's something that surprises most beginners: hydroponics actually has fewer pest problems than traditional farming because there's no soil for pests to hide in.
The ones you do need to watch for in Indian greenhouse conditions are aphids, spider mites, whiteflies, and fungus gnats especially during humid monsoon months.
How to keep them out:
• Put fine mesh screens on vents and doors
• Place sticky traps to catch early visitors
• Inspect plants every 2–3 days, early detection is everything
• If something does appear, neem oil works well and is easily available across India. For serious infestations, introduce predatory insects rather than reaching for chemical pesticides, it's cheaper and doesn't harm your crop quality.
• Between harvests, clean everything like trays, pumps, pipes with a mild bleach solution. This one habit prevents 80% of disease problems
Need help to Start Your Hydroponics Farm?
If you want to start your hydroponics farm, please book a free consultation here.
Let’s help you build a profitable, sustainable farming business.
Recent Posts
Your Farm. Your Future.
Every great harvest starts with the right conversation. Let our experts design a polyhouse built around your land, crop, and climate.
Talk to an ExpertFrequently Asked Questions
In this video, Abhishek Bhatt, Director of Agriplast Protected Cultivation, will provide a comprehensive breakdown of why Agriplast Polyhouse outperforms other polyhouses in terms of yield. He'll elucidate on key features like superior design, Israeli technology application, and optimal environmental control. The design facilitates enhanced ventilation, ensuring ideal growing conditions. Additionally, the use of Israeli technology, tailored for Indian agricultural needs, plays a crucial role in maximizing yields. Stay tuned to gain valuable insights into how Agriplast Polyhouse revolutionizes protected cultivation for superior agricultural outcomes.
A greenhouse is a transparent structure which is made using glass where plants are grown under certain climatic conditions. The agricultural industry has got many innovations, and the greenhouse technology makes use of modern and smart technology to give optimum facilities to the plants for their better and more efficient growth all around the year. Polyhouse is a kind of greenhouse where polyethene plastic material is used to create the polyhouse instead of the use of glass.
A greenhouse is designed to grow plants even in adverse climatic conditions. The translucent glass that covers the greenhouse gives the plants enough light to let them carry the photosynthesis process easily by absorbing light energy. Since the greenhouse is in an airtight condition, a sufficient amount of sunlight makes the greenhouse warmer from within than the outer atmosphere.
Greenhouse not only warms the greenhouse from within only in summers but in winters; it allows for an artificial heating solution which is effective but is a bit expensive. Some other inexpensive ways of warming up your greenhouse are:
- If you cover the inside of a greenhouse structure with a bubble layer wrap, you will observe a reduction in heat loss.
- Good power supply availability will allow you to add electric fan heaters to circulate hot air within the greenhouse for the plant's growth.
- You can also get electric greenhouse heaters installed that come with an inbuilt thermostat and works automatically when the temperature of the outer surroundings goes down.
Greenhouse benefits you in several different ways, which are listed below:
- Helps in producing fresh crops at any time of the year.
- The facility of producing the crops all around the year, even in adverse climatic conditions.
- The greenhouse allows the farmers to create an exclusive environment for the better plant growth.
- Protects crops from adverse climatic conditions.
- The light energy within a greenhouse is distributed evenly to all the plants.
- Greenhouse installation makes it easy for the farmers to grow crops with less use of pesticides.
- Greenhouse setup helps in saving the total usage of resources.